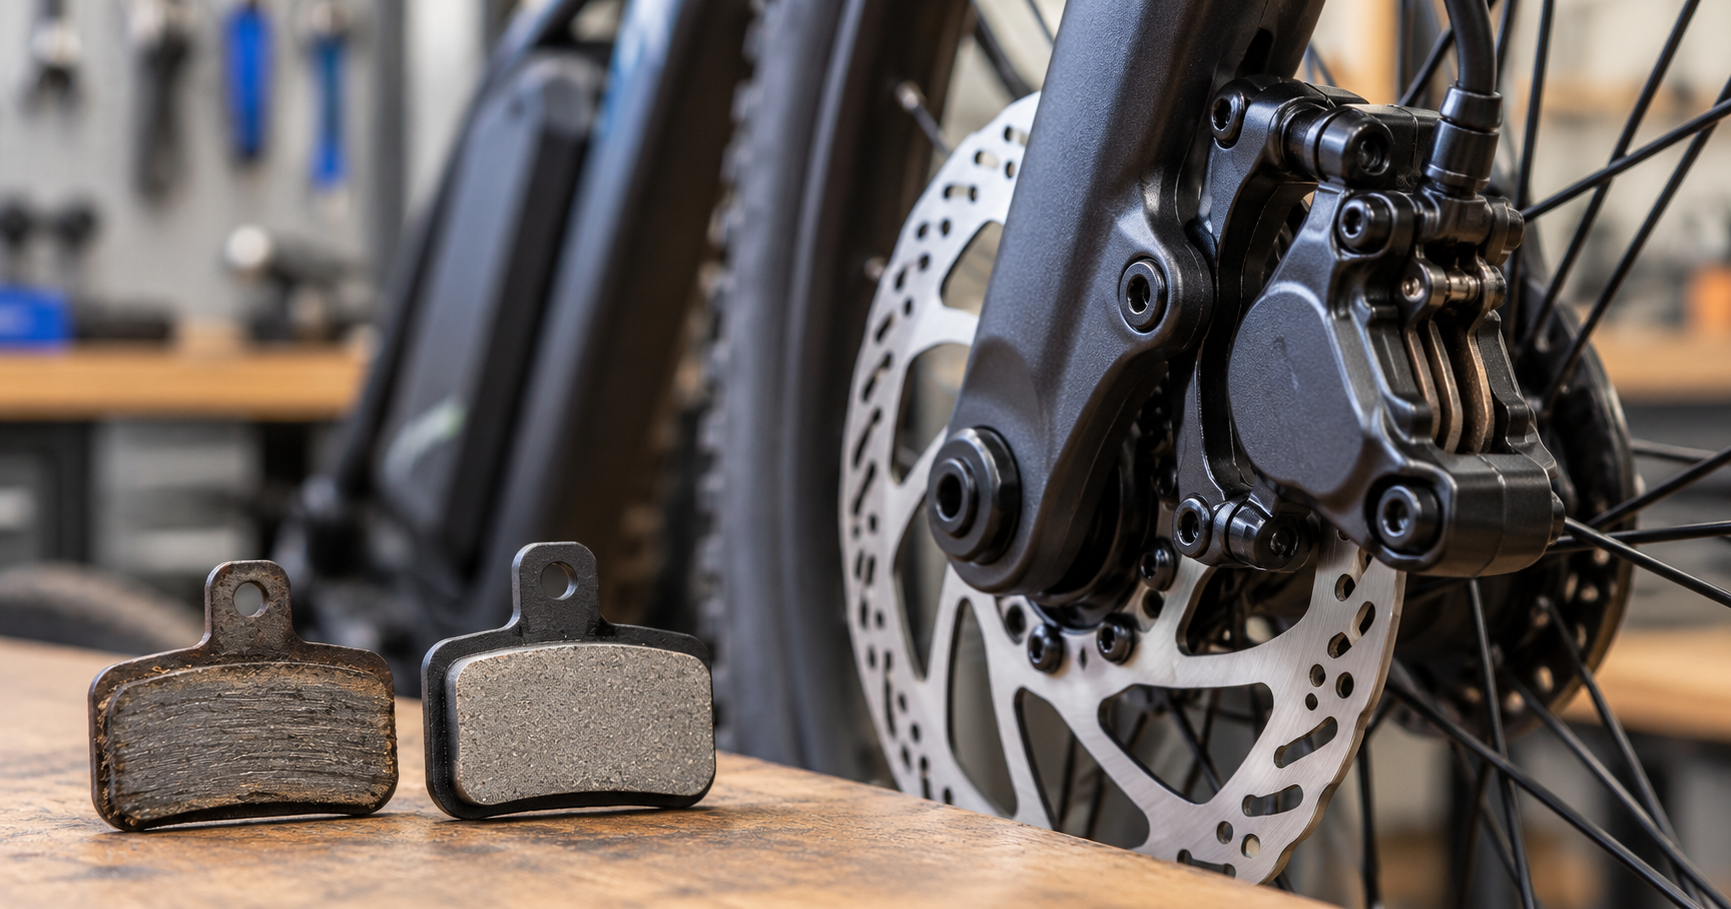
You should replace eBike brake pads when they reach the brake manufacturer’s minimum usable thickness, are contaminated or damaged, or can no longer deliver predictable braking after correct adjustment. Do not wait for a universal mileage number: rider weight, hills, weather, cargo, speed, pad compound, rotor condition, and braking technique can change pad life dramatically.
Table of Contents
ToggleThe Fast Answer: Inspect Condition, Not Just Mileage
Two riders with the same eBike can wear pads at very different rates. A commuter on flat, dry streets may get much more life from a set than a heavier rider descending long hills in wet weather. A cargo eBike or a fast Class 3 eBike may also place more heat and load on its brakes.
That makes mileage a reminder to inspect, not a dependable replacement schedule. Your brake or caliper manufacturer’s instructions are the controlling source for minimum thickness, approved parts, and service procedure.
The U.S. Consumer Product Safety Commission advises micromobility riders to check brakes before riding and follow the manufacturer’s directions. Electric Ride Nerd’s 5-minute eBike pre-ride safety check can help make that habit routine.
Brake-Pad Wear Signs and What to Do
| What you notice | What it may mean | Smart next action |
|---|---|---|
| Pad material is at or near the maker’s minimum | Normal wear | Replace with an approved pad before riding |
| Scraping or harsh metal-on-metal sound | Pad material may be exhausted; rotor may be damaged | Stop riding and inspect the full brake system |
| Braking takes more lever force or more distance | Wear, contamination, glazing, adjustment, air, cable stretch, or another fault | Inspect; do not assume pads are the only cause |
| Squeal that began after lubricant or cleaner exposure | Possible contamination | Stop using the affected brake and follow maker guidance; replacement may be required |
| One pad is much thinner than the other | Caliper alignment or piston movement may need attention | Correct the cause, not only the worn pad |
| Pad is cracked, chipped, crumbling, or unevenly glazed | Heat, damage, or poor contact | Replace and inspect the caliper and rotor |
| Lever reaches unusually close to the grip | Adjustment, cable, fluid, air, leak, or wear issue | Do not ride until braking is restored and verified |
A new noise is useful information, but noise alone is not a thickness gauge. Wet rotors can sound different, and contamination can make a pad noisy even when friction material remains. On the other hand, a quiet brake can still have thin pads. Inspection matters.
How to Check eBike Brake Pads
First identify whether the bike has disc brakes or rim brakes and locate the exact brake model. Most current eBikes use disc brakes, but the correct inspection and replacement steps depend on the system.
Before touching the brake, turn the eBike off and stabilize it. Keep fingers, clothing, and tools clear of the rotor. Never squeeze a hydraulic brake lever while the wheel is removed unless the brake maker’s instructions call for a transport spacer or service block.
Use the maker’s inspection method. Some calipers allow a useful view with the wheel installed; others require pad removal for an accurate measurement. If removal is required and you are not confident about retaining clips, pad springs, piston position, torque, or wheel installation, use a qualified bicycle mechanic.
When you can see the pad, inspect the friction material—not the metal backing plate. Compare its remaining thickness with the manual for that exact brake. For example, one Shimano brake user manual specifies that the pads it covers should not be used at 0.5 mm or less. That is a Shimano-specific instruction, not permission to apply 0.5 mm to every brake.
Also inspect for uneven wear, cracking, glazing, missing material, and signs of oil or grease. Look at the rotor for obvious deformation or damage, following its manufacturer’s wear limit. If the rotor, hydraulic system, cable, or caliper is the real problem, new pads alone will not make the brake safe.
Compatibility Comes Before Compound
Brake pads are not universal. A listing that says “for eBikes” is not enough. Confirm compatibility in this order:
- Brake or caliper make and exact model. Find the model marking on the caliper or in the bike documentation.
- Pad shape and retention system. The outline, holes, tabs, spring, pin, and clip must match the caliper.
- Approved backing plate and features. Some systems use fins or specific backing materials; use only options approved for the brake.
- Rotor compatibility. Some rotors are marked for resin pads only. A pad that fits the caliper can still be wrong for the rotor.
- Manufacturer instructions. Confirm the compound, replacement procedure, torque values, and wear limits in the current documentation.
If a seller’s compatibility list conflicts with the brake manufacturer, follow the manufacturer. When the caliper marking is unreadable or the bike’s specification has changed since purchase, ask the bike or brake maker—or have a shop identify the system.
Resin, Metallic, Semi-Metallic, and “Ceramic” Pads
Compound names are not perfectly standardized, so treat the following as common tendencies rather than promises.
Resin or organic pads are often chosen for quieter operation and a smooth initial feel. They may wear faster under prolonged heat, grit, or wet conditions. They are also the only approved choice for some rotors.
Metallic or sintered pads commonly tolerate heat and abrasive conditions well and may last longer in demanding use. They can be noisier and may feel different at the lever. They must not be installed on a rotor restricted to resin pads.
Semi-metallic pads aim for a middle ground, but the actual formulation varies. Check the manufacturer’s performance and compatibility statements rather than assuming every semi-metallic pad behaves alike.
“Ceramic” pads are sold for some bicycle brakes, but the label can describe different formulations across brands. It is not a universal upgrade category. Confirm that the exact pad is approved for the caliper and rotor, then evaluate the maker’s stated use case.
The best compound is the compatible one suited to your conditions. A quiet urban commuter, a heavy cargo setup, and a long mountain descent do not ask the same thing of a brake. Compatibility and predictable control matter more than an “eBike-rated” label.
Should You Replace the Pads Yourself?
Pad replacement can be reasonable for an owner who has the correct instructions, tools, parts, and confidence to verify the work. It is not the right first repair for everyone.
Use a professional mechanic if you cannot positively identify the brake, see a leak, find a cracked or deformed rotor, suspect contamination, have uneven wear you cannot explain, or cannot restore a firm and predictable lever. The same applies if the procedure requires hydraulic bleeding or a caliper adjustment beyond your experience.
If you do the work, keep pad and rotor braking surfaces free of chain lubricant, grease, skin oils, and unapproved cleaners. Use the specified torque values and retention hardware. Electric Ride Nerd’s essential eBike maintenance tools guide can help you distinguish routine tools from jobs that need specialized equipment.
Bed In New Pads and Recheck the Brake
New pads and rotors need a controlled bed-in process so their surfaces work together. Follow the brake maker’s exact procedure in a safe, traffic-free area. Braking force may change as the pads bed in, so begin cautiously rather than assuming full performance on the first stop.
After service, verify wheel installation, pad retention, caliper clearance, lever feel, and braking operation before returning to normal riding. Recheck the system after the initial rides for rubbing, loosening, unusual wear, or changing lever feel.
For the broader maintenance picture, see How Often Should You Service an eBike? and eBike and eScooter Maintenance for Beginners.
A Simple Replacement Decision
Replace the pads when the exact manufacturer limit is reached, or sooner when they are contaminated, cracked, crumbling, or otherwise unsafe. Investigate the whole brake when symptoms do not clearly point to ordinary pad wear. Confirm the caliper, pad shape, rotor, and approved compound before buying.
Most important, do not continue riding to “use up” questionable brakes. A modest pad purchase is cheaper than a damaged rotor—and dependable stopping is more important than extracting the last fraction of pad life.
Frequently Asked Questions
How many miles do eBike brake pads last?
There is no dependable universal mileage. Terrain, total load, weather, speed, braking technique, compound, and brake design all matter. Inspect condition regularly and follow the brake maker’s wear limit.
Can I replace only one brake pad?
Disc-brake pads are normally serviced as the matched pair specified for the caliper. A major difference in wear between the two pads can signal alignment or piston trouble that should be corrected.
Can I put metallic pads on any eBike rotor?
No. The pad must fit the caliper, and the rotor must be approved for that compound. A rotor marked “resin only” should not be used with metallic pads.
Do squealing brakes always need new pads?
No. Water, alignment, glazing, contamination, or other issues can cause noise. Because contamination can reduce braking even when material remains, diagnose the cause rather than judging by sound alone.
Is a thicker pad always compatible?
No. Pad outline, backing plate, retention hardware, compound, and brake-model approval all matter. Match an approved part number or manufacturer compatibility chart.