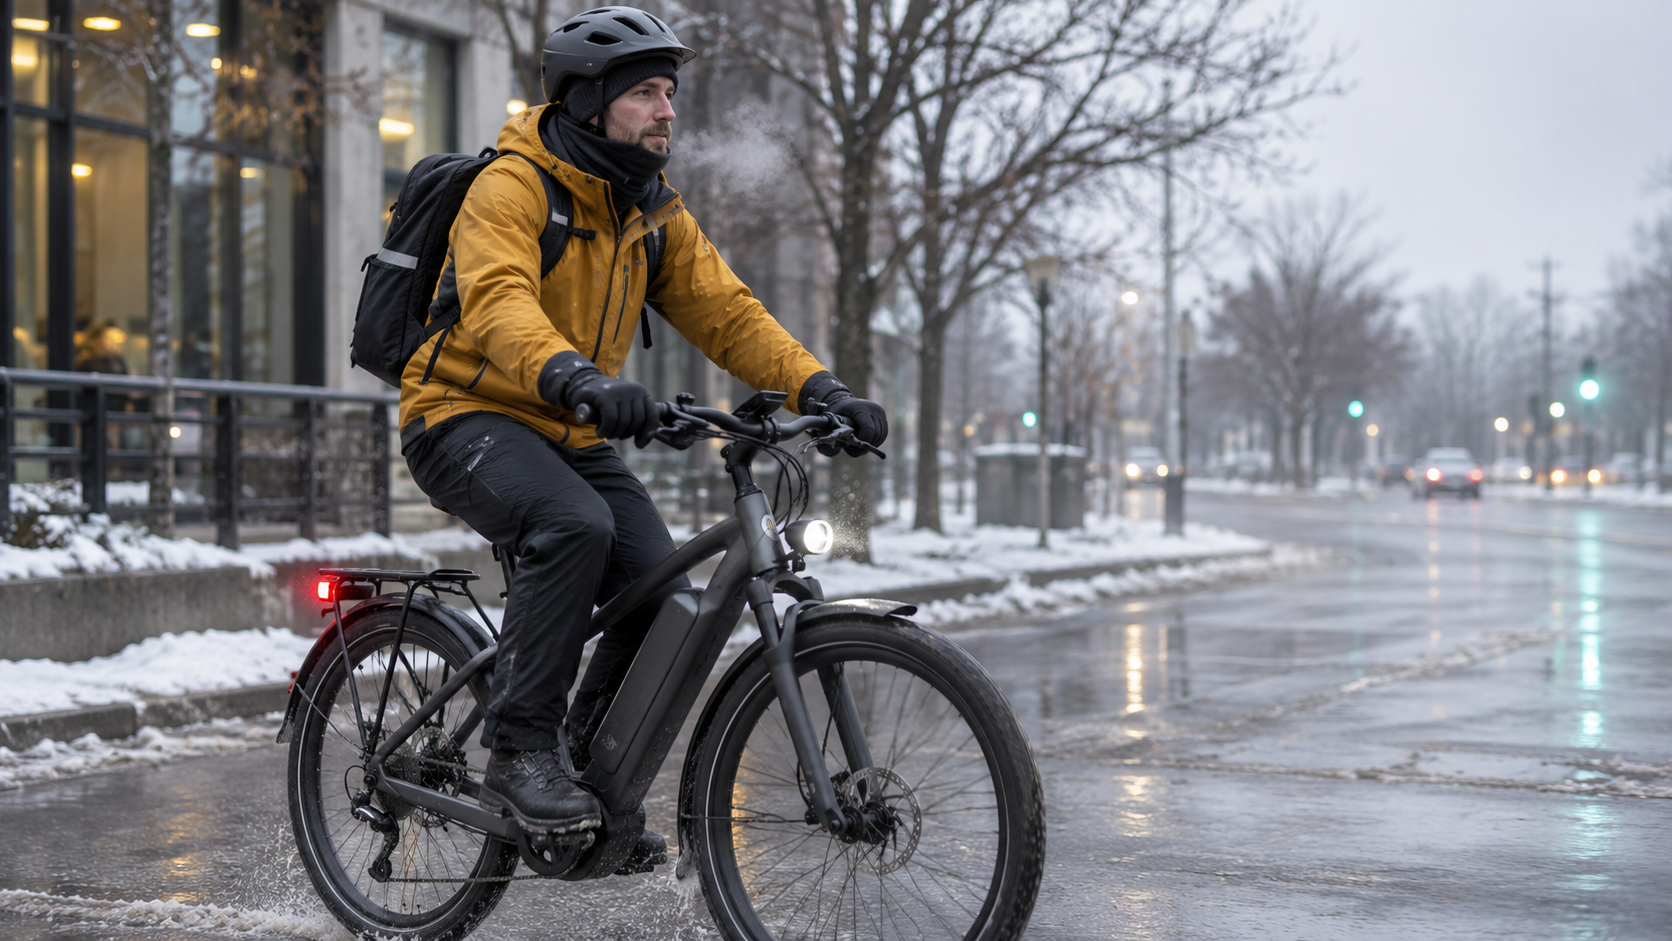
Winter eBike commuting is not simply summer riding with a heavier coat. Cold affects the rider, battery, tires, braking distance, visibility and the time available to make a safe decision. A dependable setup treats those parts as one system.
Start with a simple rule: build more margin than you use in mild weather. Expect the trip to take longer, expect the battery to deliver less range, and expect ordinary road features—paint, leaves, metal covers, slush and shaded corners—to offer less grip.
The goal is not to prove that an eBike can handle every winter day. It is to make the normal commute comfortable and predictable, while keeping a clear point at which you choose another way to travel.
Table of Contents
ToggleDress for Control, Not Maximum Warmth at the Door
The best clothing system keeps you warm enough without making you sweat heavily. You may feel slightly cool when you first step outside; the motor assists you, but you still generate heat while pedaling.
Use adjustable layers. A moisture-managing base layer moves sweat away from the skin. A light insulating layer adds warmth. A wind-resistant or weather-resistant outer layer protects against cold air and precipitation. Choose pieces you can vent or remove when the temperature rises during the commute.
Avoid bulky clothing that catches on the saddle, blocks your view when you turn your head or restricts your arms. Check that pant legs, drawstrings and loose straps cannot reach the chain, belt drive, wheel or brake rotor.
Pack one small backup layer when the consequences of a delay are high. A minor mechanical problem feels very different when you are moving than when you are standing beside the road.
Protect Your Hands, Feet and Face Without Losing Feel
Cold hands reduce comfort and can also reduce control. Your gloves must let you operate both brakes, the shifter, assistance controls and any bell without fumbling. If thick gloves make the levers difficult to reach, change the glove system or have the controls adjusted appropriately rather than accepting poor control.
Warm socks and wind-resistant footwear help, but extra thickness should not make the shoe tight. Compression can reduce comfort and leave less room for warm air. Water resistance matters when roads are wet or slushy.
A thin cap or ear covering may fit under a helmet if the helmet still sits level and securely. Do not place a bulky hood or thick hat under the helmet in a way that changes the fit. A neck gaiter can protect exposed skin, but it should not interfere with breathing, hearing or peripheral vision.
Make Visibility Part of the Clothing System
Winter commuting often begins or ends in darkness. Even daytime conditions can be flat, grey and wet. NHTSA recommends bright clothing, reflective gear, a white front light and a red rear light when visibility is poor.
Use lights in a mode that makes you visible without dazzling other road users. Check them before every trip and know how cold affects their runtime. Reflective details on moving legs or ankles can help drivers recognize a cyclist’s motion, while a reflective vest, jacket panel or bag cover adds a larger visible area.
Keep lights, reflectors and reflective surfaces clean. A strong light covered by road spray may provide less visibility than you expect.
Start Winter With a Working Bike
Cold weather exposes small maintenance problems. Check brake-pad life, rotor or rim condition, tire wear, wheel security, shifting, lights and fenders before winter becomes routine. If the brakes are weak or inconsistent in dry weather, winter is not the time to hope they improve.
Fenders reduce the amount of slush and dirty water reaching you and the bike. They do not replace cleaning, but they can make frequent commuting more manageable.
Test the bike in a low-risk place after any major tire or equipment change. A wider tire, studded tire or different tread may change steering feel, noise and rolling resistance.
Winter commuting makes regular bike inspections even more important. Having the right tools at home can help you check tire pressure, maintain your drivetrain and identify minor problems before they interrupt a cold-weather ride. Our eBike Maintenance Tools guide explains which tools beginners actually need and includes recommended equipment for building a practical home toolkit.
Choose Tires for the Conditions You Actually Face
There is no single winter tire for every commute. A rider dealing mainly with cold, wet pavement has different needs from a rider crossing packed snow or recurring ice.
Look at the route before buying equipment. How often is it plowed? Are side streets treated later than main roads? Do bridges, shaded paths or parking-lot entrances freeze first? Are you riding through loose snow, hard-packed snow, slush or mostly wet pavement?
More tread can help in loose material. A wider tire may provide a larger contact patch when the rim and frame permit it. Studded tires can improve grip on ice, but they do not create normal dry-pavement traction and they do not eliminate the need to slow down.
Use only tire sizes and pressure ranges approved for the bicycle, rim and tire. Do not copy a low pressure from another rider without checking your system, load and risk of rim strikes or tire instability.
Treat Braking and Cornering as a Traction Budget
Your tires have limited grip. Hard braking, sharp steering and strong acceleration all demand some of that grip. On a slick surface, asking for two or three at once can exceed what is available.
Slow before the corner. Keep the bike more upright. Brake earlier and more progressively than you would on dry pavement. Use both brakes smoothly according to your bike’s handling and your training. Avoid sudden high-assist acceleration while leaned over or crossing paint, metal, leaves or ice.
Increase following distance and leave room for drivers who may also need longer to stop. If a section looks questionable, reducing speed before you reach it is better than making a sudden correction on top of it.
Expect Less Battery Range in the Cold
Freezing conditions can temporarily reduce usable battery capacity. The practical response is not to chase a universal percentage; it is to start with more reserve and learn how your own system behaves.
Bosch advises storing and charging its batteries at room temperature for winter use, then inserting the battery shortly before the ride. Follow the temperature limits and procedure in your battery and charger manuals. Do not charge a battery in conditions the manufacturer prohibits, and do not improvise heat sources around it.
Plan the commute so it does not depend on arriving with almost no charge. Headwinds, heavier clothing, low tire pressure, slush, frequent starts and a colder battery can all increase energy use. If your summer round trip uses half the battery, winter may require a charging plan or a larger reserve.
Use only the supplied or manufacturer-recommended charger. The CPSC advises being present while charging, never charging while asleep and unplugging when charging is complete.
Keep the Battery and Contacts Dry and Undamaged
An eBike designed for normal outdoor use can generally handle rain and road spray within its manufacturer rating, but it should not be treated like a submersible device. Do not use a pressure washer on the motor, battery mount, bearings or electrical connections.
After a wet or salty ride, turn the system off and follow the manufacturer’s cleaning instructions. For home storage and charging boundaries, see how to store an eBike in an apartment. Wipe away grime, inspect the battery mount and allow the bike to dry in an appropriate location. Do not place a wet battery on a heater or attempt to accelerate drying with high heat.
If the battery case, mount, connector or charger is damaged, unusually hot, swollen, leaking or behaving abnormally, stop using it and follow manufacturer or qualified-service guidance.
Build a Winter Route, Not Just a Winter Bike
The fastest summer route may be a poor winter route. Prefer streets or paths that are reliably cleared, have lower traffic speeds and provide predictable lighting. Avoid a route that depends on one steep untreated hill, an icy bridge or a path that is not maintained after snow.
Leave earlier. Extra time lets you slow down without feeling pressure to take risks. Identify a bailout point where you can turn toward transit, a sheltered location or a shorter route if conditions are worse than expected.
Check the forecast and the road, not just the temperature. Freezing rain, black ice, strong crosswinds, heavy snow and poor visibility can move the ride outside a reasonable commuting plan.
Use a Five-Minute Pre-Ride Check
Before leaving, confirm:
- The forecast and route are within your limits.
- Both brakes work consistently.
- Tires are sound and within their approved pressure range.
- Front and rear lights work and are clean.
- The battery is secure and has enough reserve for cold conditions.
- Gloves allow full brake and control operation.
- You have a backup plan if the route becomes unsafe. Keep the bike’s commuter safety kit matched to the season and route.
If one item fails, correct it or change the trip. A winter commute should not begin with a known problem that the cold, darkness or road surface can amplify.
Frequently Asked Questions
How much eBike range do I lose in winter?
There is no reliable universal percentage. Temperature, battery design, age, wind, tire setup, load, assist level and route all matter. Track your own winter trips and keep a larger reserve than you use in mild weather.
Should I bring my eBike battery indoors?
Follow the battery manufacturer’s instructions. Many manufacturers recommend protected, dry storage and room-temperature charging, but removal procedures and temperature limits vary by system.
Are studded tires necessary for winter eBike commuting?
They may help when the route regularly includes ice, but they are not necessary for every cold-weather commute and they do not make all surfaces safe. Match the tire to recurring conditions and confirm compatibility with the bike and rim.
Can I wash road salt off an eBike?
Yes, within the manufacturer’s cleaning instructions. Use gentle cleaning rather than high-pressure water, dry the bike appropriately and pay attention to the drivetrain, fasteners and battery-mount area.