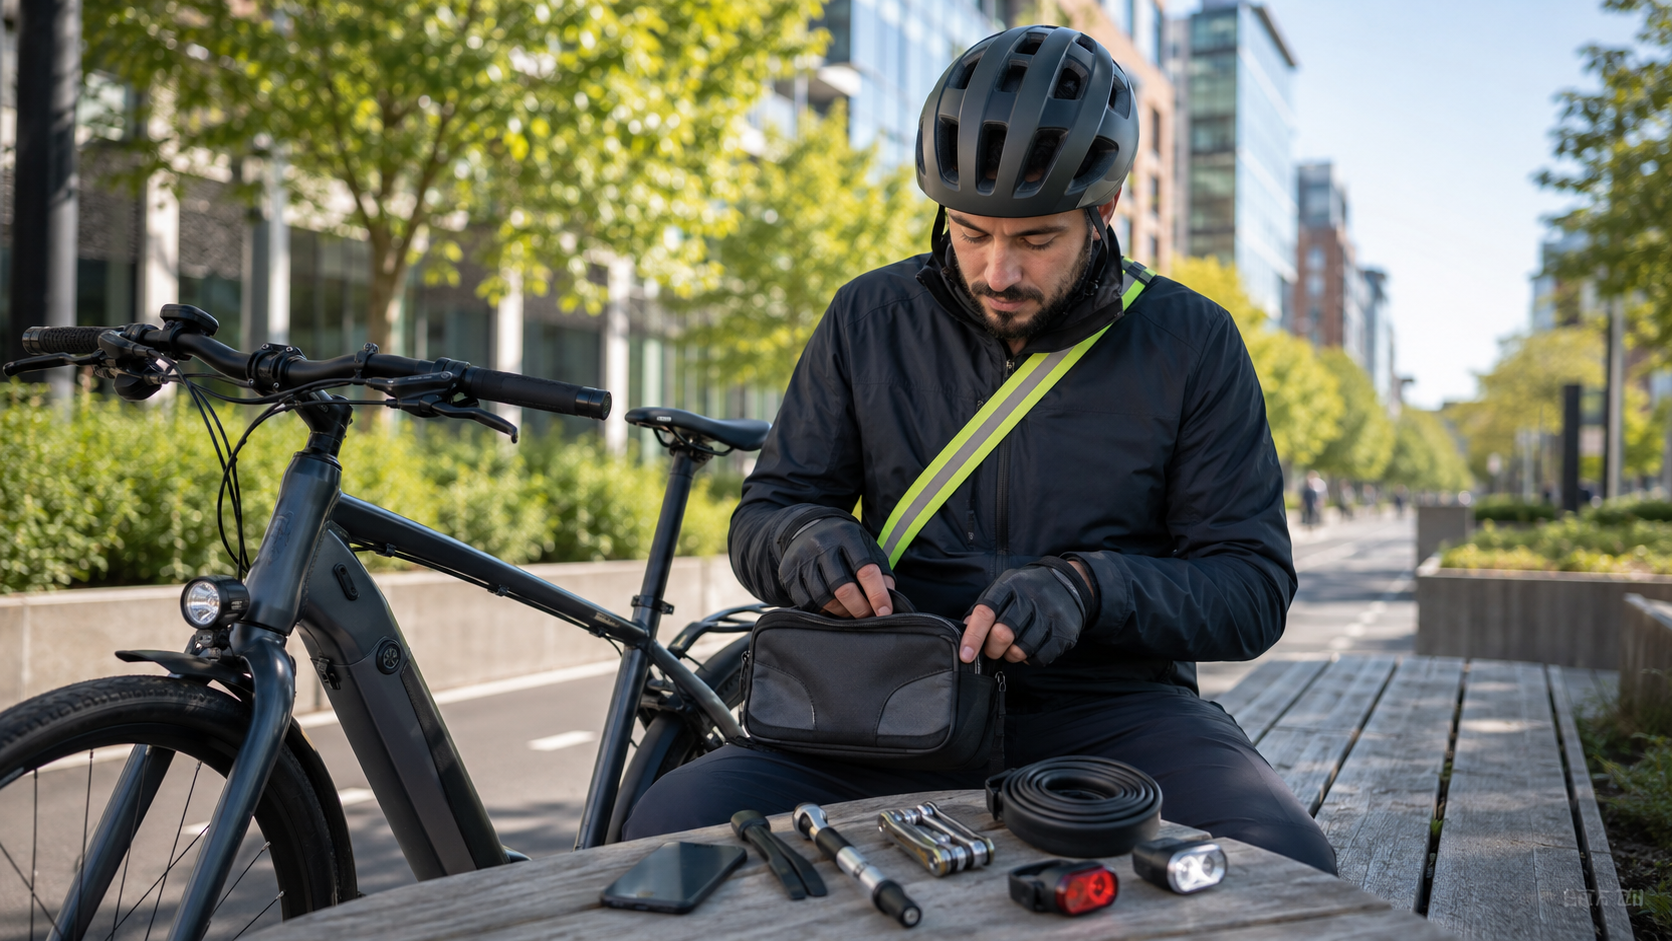
A good eBike commuter safety kit is not a miniature workshop. It is a compact system that helps you handle a simple problem, stay visible, contact help, or get the bike home without turning a minor breakdown into a larger safety issue.
The best road safety pack has four layers:
- Repair: a few bike-specific items for tasks you already know how to do.
- Visibility: backup equipment that helps other road users see you.
- Communication: a charged phone, identification, and essential contacts.
- Recovery: a realistic way to get yourself and a heavy e-bike home when the problem is beyond a roadside fix.
Table of Contents
ToggleWhy an E-Bike Road Safety Pack Is Different
Many e-bikes use familiar bicycle parts, but the electrical system, extra weight, wheel hardware, and model-specific components can change what is practical at the roadside.
A rear hub motor, for example, may add wiring and unfamiliar axle hardware to a wheel removal. An integrated battery may not be removable. A tool that fits one commuter’s fasteners may be useless on another bike. That is why the right kit starts with your owner’s manual—not a universal shopping list.
Confidence comes from knowing three things before you leave. Start with ERN’s five-minute pre-ride safety check so basic condition checks happen before the commute.
- which simple tasks you can perform correctly;
- which tools and parts fit your specific bike;
- whom you will call when repair is not the safe choice.
The Core E-Bike Commuter Safety Kit
The following categories cover the most common needs without encouraging unnecessary roadside work.
| Pack layer | Useful items | What the layer solves |
|---|---|---|
| Flat-tire basics | Correct spare tube or patch kit, tire levers, compatible mini-pump | A repairable puncture when wheel removal is familiar and permitted |
| Minor-adjustment basics | Multi-tool with the actual bits your bike uses, disposable gloves, small rag | A familiar non-critical adjustment or a clean way to re-seat an undamaged chain |
| Visibility backup | Small backup front and rear lights, reflective band or pack cover | A failed primary light or an unexpected low-visibility commute |
| Communication | Charged phone, short charging cable, compact power bank, ID, emergency-contact card | Calling for help and sharing an accurate location |
| Recovery information | Bike-shop number, roadside or insurance benefit details, transit/taxi plan, secure lock if appropriate | Getting home when repair is uncertain or unsafe |
| Bike-specific reference | Owner’s manual saved offline, tire/valve details, key numbers and service contact | Avoiding guesses about compatibility or warning codes |
NHTSA’s bicycle guidance emphasizes riding a bike that works, using bright or reflective equipment, using a white front light and red rear light when visibility is poor, securing carried items, and planning the route. Your state or local rules may set specific equipment requirements, so confirm the rules where you ride.
1. Build the Flat Kit Around Your Actual Tire
A basic flat kit normally includes a spare tube or patch kit, tire levers, and a small pump. Both Trek’s tire-repair guidance and the REI commuter checklist identify these as core items.
Compatibility matters more than quantity. Before buying or packing anything, record:
- the tire and tube size printed on the tire sidewall;
- the valve type and valve length;
- whether the tire uses a tube or a tubeless system;
- whether either wheel includes a motor, cable, unusual axle, belt drive, or other model-specific hardware;
- the inflation range and any separate pressure guidance from the tire or bike manufacturer.
A spare tube that has the wrong valve or size does not make you prepared. Neither does a pump that cannot connect to the valve.
If you have never removed and correctly reinstalled the relevant wheel, practice with the owner’s manual or a qualified bicycle technician before relying on a roadside tube change. When motor wiring or unfamiliar hardware is involved, use your recovery plan rather than experimenting beside traffic.
2. Carry Only the Adjustment Tools You Understand
A compact multi-tool is useful only if its bits match your bike and you know the task. Check the fasteners on accessories you may need to secure, then choose the smallest suitable tool.
Roadside tool use should be conservative. Re-seating an undamaged chain or securing a loose, non-safety-critical accessory may be reasonable for a rider who has practiced the task. Guessing at brake, handlebar, stem, axle, wheel, or structural adjustments is different: an incorrect repair can affect control of the bike.
If a part is cracked, bent, rubbing heavily, leaking, repeatedly loosening, or no longer operating normally, stop riding and arrange service or recovery. ERN’s guide to when your eBike needs professional service is the appropriate next step.
3. Add Independent Visibility Backup
Integrated e-bike lights are convenient, but they may depend on the main battery or electrical system. A small independent front and rear light gives you another option if the display or primary lighting fails.
Reflective gear is useful because it does not depend on a battery. A reflective ankle band, vest, or pack cover takes little space. NHTSA recommends bright clothing during the day and reflective equipment plus front and rear lighting when visibility is poor.
A backup light is not permission to continue in every condition. If you cannot meet local requirements or cannot see and be seen well enough for the route, move to a safe location and use the recovery plan.
4. Make Communication Part of the Kit
A repair kit cannot summon help when a problem is beyond your skills. A charged phone, compact power bank, short cable, identification, and an emergency-contact card can be more useful than another tool.
Before the commute, save:
- the bike manufacturer’s support information;
- a trusted local e-bike service shop;
- any roadside-assistance benefit that explicitly covers bicycles or e-bikes;
- a family or emergency contact;
- a transit, taxi, or other recovery option that can accommodate the bike.
Do not assume a ride service or transit vehicle will accept an e-bike. Check its current policy in advance, including any restrictions involving size, weight, or lithium-ion batteries.
What Can You Fix—and When Should You Recover?
The deciding factors are not just the problem and the tools. Your location, visibility, experience, bike design, weather, traffic, and ability to verify the repair all matter.
| Situation | A limited roadside action may be reasonable when… | Stop and recover when… |
|---|---|---|
| Low tire or ordinary puncture | The tire and rim are undamaged; the kit fits; wheel removal is familiar; you can work fully away from traffic | The tire or rim is damaged; the wheel has unfamiliar motor wiring or hardware; the repair will not hold |
| Dropped chain | The chain is intact; the system is switched off; you have practiced re-seating it; nothing is bent or jammed | The chain is broken, twisted, repeatedly drops, or is trapped near wiring or the motor system |
| Loose accessory | It is non-critical, the correct tool is available, and you know the attachment | It affects steering, braking, wheel security, rider control, or safe cargo retention |
| Light failure | An independent backup works and the ride remains lawful and reasonably visible | No suitable backup is available or conditions make safe visibility doubtful |
| Loss of electrical assist | The bike otherwise operates normally and the manual permits ordinary pedaling without assist | There is heat, odor, smoke, leakage, physical battery damage, damaged wiring, or abnormal braking/handling |
| Brake, steering, wheel, fork, or frame problem | — | Do not continue riding; arrange professional assessment and recovery |
| Crash or rider injury | — | Prioritize people, contact emergency services when needed, and do not ride a possibly damaged bike |
This table is a decision aid, not a diagnosis. If you cannot identify the problem confidently or verify that the bike is operating normally afterward, recovery is the correct result.
The E-Bike Electrical Red Line
Do not open, modify, bypass, or attempt to repair an e-bike battery at the roadside. Do not probe damaged wiring or try an unknown charger.
The CPSC Micromobility Information Center says to use the charger provided with or recommended by the manufacturer and to use replacement batteries approved as suitable by the device manufacturer. It also warns against battery packs modified or reworked by unqualified people. Shimano’s current e-bike battery documentation similarly describes the battery as having no user-serviceable parts and directs unclear installation or service work to qualified support.
If a battery is unusually hot, swollen, leaking, discolored, damaged, giving off an unusual odor, smoking, or burning:
- stop using the bike;
- keep people away and move yourself to a safe location;
- do not touch a hot or leaking battery;
- call emergency services for smoke, fire, injury, or an immediate public hazard;
- follow the manufacturer and local authority instructions for the next step.
Never pack a so-called universal charger as a generic solution. CPSC has specifically warned about fire incidents involving incompatible “universal” micromobility chargers.
Use a Simple Stop-and-Assess Routine
When something feels wrong, avoid diagnosing it while moving.
- Signal and stop safely. Move fully away from the travel path when you can do so without creating another hazard.
- Switch the system off. Remove the battery only if the manufacturer’s instructions call for it and it is undamaged, cool, and safe to handle.
- Check people first. After a collision or hard stop, deal with injuries and traffic danger before the bike.
- Observe without dismantling. Look for obvious tire, chain, wheel, cargo, light, wiring, or battery problems.
- Choose repair or recovery. Attempt only a practiced, compatible, low-risk task in a safe location.
- Verify before riding. If braking, steering, wheel security, tire seating, or normal operation is uncertain, do not continue.
Practice the Pack Before You Depend on It
The kit creates confidence only when you have tested it. At home, spend five minutes on a dry run:
- find the tire size, valve type, and pressure information;
- connect the pump to the valve;
- identify which multi-tool bits match ordinary accessory fasteners;
- switch on the backup lights;
- open the saved owner’s manual without internet access;
- confirm that the recovery number and location-sharing method work;
- check that the loaded bag is closed and securely attached.
NHTSA advises carrying items in a backpack or secured to the rear of the bike. Do not hang loose bags or tools from the handlebars, where they may interfere with control.
Review the pack when seasons change, after using an item, or when you change tires, wheels, bags, batteries, or bikes. Recharge the lights and power bank, replace expired first-aid items, and confirm that the tube and tools still match. Routine care also matters; use ERN’s guide to clean your eBike safely.
Prepared Does Not Mean Repairing Everything
The goal of a road safety pack is not to finish every commute at any cost. It is to turn uncertainty into a short sequence of safe choices.
A compatible flat kit may get you moving again. A backup light may keep a small failure from becoming a visibility problem. A charged phone and a planned ride home may be the best tools for everything else.
Build the pack for your actual e-bike, practice the simple tasks at home, and treat recovery—not improvisation—as a successful outcome when a problem crosses your skill or safety boundary.
Frequently Asked Questions
What should I carry in an eBike commuter safety kit?
Start with a compatible spare tube or patch kit, tire levers, mini-pump, a multi-tool that fits your bike, backup front and rear lights, reflective gear, a charged phone, ID, an emergency contact, and a recovery plan. Add items only after checking your bike, route, skills, weather, and local requirements.
Can I repair an eBike flat tire at the roadside?
You may be able to repair an ordinary flat if the wheel-removal method is familiar, your tools and tube fit, the tire and rim are undamaged, and you can work safely away from traffic. Hub-motor wiring, unusual axles, belt drives, or proprietary hardware can make removal model-specific. When uncertain, recover the bike instead.
What should I do if my eBike battery stops working during a commute?
Stop safely and follow the troubleshooting steps in the owner's manual that do not require opening or modifying the electrical system. If the bike otherwise operates normally and the manufacturer permits unassisted pedaling, that may be an option. Heat, swelling, leakage, odor, smoke, damaged wiring, or physical battery damage means stop using the bike and seek qualified or emergency help as appropriate.
Should I carry a spare battery or charger?
Only use a battery or charger that the e-bike manufacturer confirms is suitable for the exact system. A spare battery adds weight and must be transported and secured according to the manufacturer's instructions. Do not use a supposed universal charger as a substitute for verified compatibility.