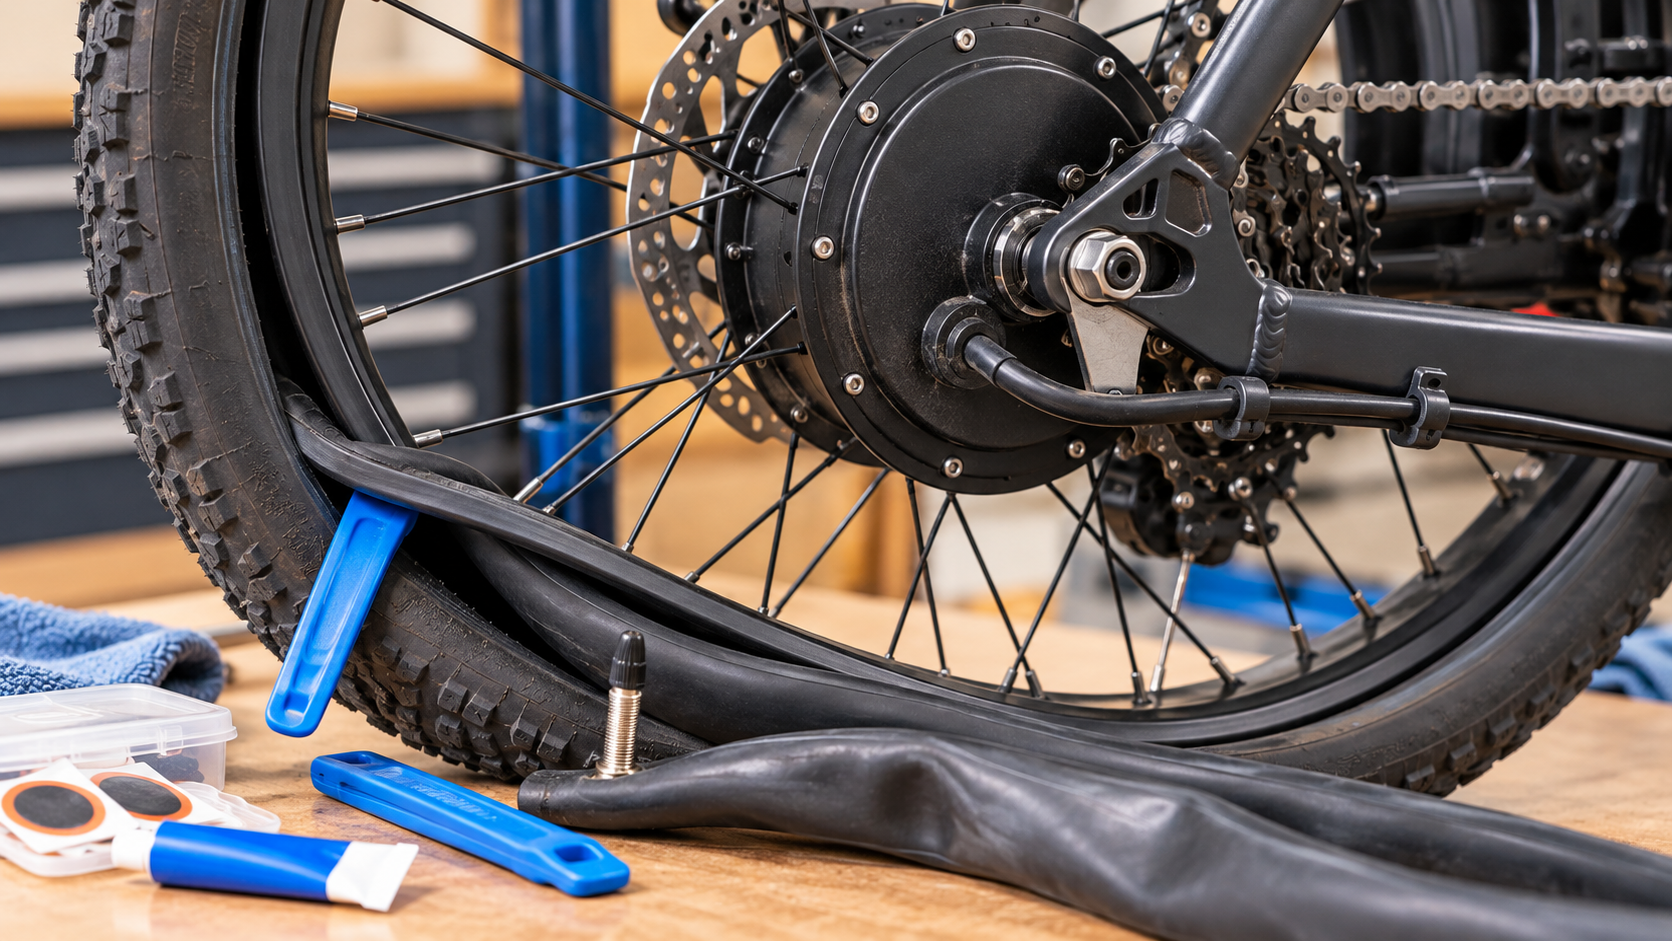
Fixing a hub motor eBike rear flat requires more care than repairing a conventional bicycle tire. The rear wheel contains the electric motor, and its cable, connector, axle hardware, and sometimes a torque arm all need protection. A routine tube replacement can become an expensive repair if the wheel hangs by its wiring or the axle is reinstalled incorrectly.
The safest first question is whether you can repair the puncture without removing the wheel. If wheel removal is necessary, use the manufacturer’s instructions for your exact eBike model. This guide explains the decisions, tools, and safety checks that apply to many rear hub-motor eBikes without assuming that every motor or axle assembly is built the same way.
Before starting: Turn the bike off and remove its battery if the manufacturer recommends removal and it can be done safely. Never disconnect a powered motor connector. If you cannot identify the correct disconnection point or axle-retention procedure, consult an eBike-qualified mechanic.
Table of Contents
ToggleAt a Glance: Choose the Right Repair Method
| What You Find | Recommended Action |
|---|---|
|
Small puncture in a tubed tire Accessible while the wheel remains installed. |
Consider an in-place tube patch if you can access the puncture safely without disturbing the motor wiring. |
|
Repairable tubeless tread puncture Tire and rim use a compatible tubeless system. |
Use a manufacturer-approved tubeless repair method. A standard inner-tube patch is not the same procedure. |
|
Tube requires replacement The puncture cannot be repaired safely with the wheel installed. |
Remove the rear wheel only with model-specific instructions and the correct tools. |
|
Damaged cable, connector, rim, or axle hardware Includes damaged dropouts, torque arms, or brakes. |
Do not ride. Have the bike inspected and repaired by an eBike-qualified technician. |
Why a Hub Motor eBike Rear Flat Is Different
On a conventional bicycle, the rear axle is primarily a mechanical connection. On a rear hub-motor eBike, the motor sits inside the wheel hub, and its electrical cable usually exits near the axle.
That cable can be strained, twisted, or pinched when the wheel is lowered, rotated, or supported incorrectly. Hub-motor axle flats and anti-rotation hardware must also resist motor torque. Their arrangement varies significantly between eBike models.
Some bicycles have a weather-resistant motor connector along the chainstay. Others use different cable routes or service arrangements. Never cut motor wiring, pull on a cable to disconnect it, or assume an unfamiliar connector is designed to separate.
The important difference when fixing a hub motor eBike rear flat is that you must protect both the electrical system and the mechanical wheel-retention components.
1. Diagnose the Flat Before Loosening Anything
Before reaching for a wrench, establish what caused the flat and whether the tire can be repaired with the wheel still installed.
- Move to a safe work area. Stop riding, switch off the electrical system, and support the bike securely. A kickstand or light-duty repair stand may not safely support a heavy eBike during wheel removal.
- Identify the tire system. Determine whether the wheel uses an inner tube or an approved tubeless setup. A wide tire is not necessarily tubeless.
- Look for the puncture source. Inspect the tread for glass, thorns, nails, and cuts. Mark any suspected puncture location. Use a cloth or suitable tool when checking for sharp objects.
- Check the sidewalls and rim. A damaged tire casing, exposed reinforcement, bent rim, or damaged bead may require replacement or professional repair.
- Assess accessibility. On some tubed setups, you can expose part of the tube while leaving the wheel secured in the frame. Do not force the tire bead or tools against the motor cable, brake rotor, or frame.
A slow leak does not necessarily mean a thorn in the tread. Tubes can also fail at the valve stem, against damaged rim tape, or from pinch damage caused by an impact.
Finding the cause matters. A replacement tube may puncture immediately if a piece of glass, exposed spoke hole, or other hazard remains inside the tire.
2. Gather the Tools and Correct Parts
Four essentials to prepare before touching the hub-motor wheel.
Prepare the right tools
Rim-compatible tire levers, the correct axle wrench or socket, and a calibrated torque wrench if wheel removal is required.
Match your replacement
Compatible inner tube or approved patch kit, pump, and pressure gauge. Tubeless systems require compatible repair materials.
Know your model
Manufacturer instructions for wheel removal, axle torque, washer orientation, torque arms, and motor-connector handling.
Set up safely
Weight-rated bike support, good lighting, gloves, a clean cloth, a phone camera, and a tray for axle hardware.
Before wheel removal: Confirm the motor cable’s route and how every axle-retention part must go back together. Never guess at torque settings or washer orientation.
Match the replacement tube to the tire’s marked diameter, width range, and valve type. An electric bicycle does not automatically require a special inner tube, but tire load ratings and manufacturer specifications still matter.
If you’re assembling a repair kit for the first time, read our guide to essential eBike maintenance tools for beginners. It explains which tools are genuinely useful, why a torque wrench matters for certain repairs, and how to avoid buying equipment that doesn’t suit your bike.
For additional technical information about matching tire and tube dimensions, consult Park Tool’s tire and tube fit standards.
3. When Possible, Patch a Tube Without Removing the Wheel
Repairing the puncture without removing the wheel avoids disturbing the motor cable and axle assembly. This may be the simplest option for a small, accessible puncture.
However, it only works when enough of the tire bead and tube can be reached without stretching, pinching, or damaging other components.
- Deflate the tire completely. Note the suspected puncture location identified during your inspection.
- Release a section of tire bead. Use suitable tire levers while following the tire and rim manufacturer’s instructions. Avoid levering against electrical or brake components.
- Expose the punctured tube. Remove only enough of the tube to locate the leak. Light inflation may help you hear escaping air. Water can also reveal bubbles at the puncture.
- Inspect the matching tire area. Carefully remove any thorn, glass fragment, or other object. Check that rim tape and the inner tire surface are undamaged.
- Apply the correct patch. Follow the patch manufacturer’s preparation, application, and curing instructions. Some self-adhesive patches are intended primarily for temporary roadside repair.
- Refit the tube carefully. Make sure it is not twisted, folded, or trapped beneath the tire bead.
- Inflate gradually. Stay within the pressure limits for the tire, rim, and bike. Check both sides of the bead before reaching the required pressure.
Do not force an in-place repair. If there is not enough access to handle the tube without contacting the motor cable, brake rotor, or frame, use the manufacturer’s wheel-removal procedure or seek professional help.
Park Tool’s inner-tube repair guide provides additional detail about finding and patching punctures.
4. Protect the Hub-Motor Cable Before Wheel Removal
Trace the cable from the motor hub toward the bicycle frame. Identify where it exits the axle, where it is secured, and whether your bike has an approved service connector.
Take clear photographs of the cable route before disturbing anything. Look for damaged insulation, abrasion, flattening, corrosion, or strain near the axle.
If the manufacturer requires disconnecting the motor, follow its specific power-off procedure. Where a connector is designed to separate, handle the connector housing rather than pulling on the wires.
Some connectors use alignment marks, locking mechanisms, or keyed pins. Never twist or force a connector that does not separate as instructed.
Critical rule: The rear wheel must never hang from the motor cable. Support the full weight of the wheel independently as soon as the axle begins to move.
If the cable is visibly damaged or the connector has bent pins, stop. Do not improvise a wiring repair or attempt to straighten potentially energized electrical contacts.
5. Document the Axle, Washers, and Torque Arm
Before loosening the rear axle, photograph both sides of the assembly. Record the order and orientation of axle nuts, washers, spacers, torque arms, and cable-routing components.
Some washers contain tabs or keyed surfaces that fit into the dropout in a particular direction. Parts that look nearly identical may not be interchangeable.
A torque arm is a reinforcement used on some hub-motor bicycles to help resist axle rotation under motor load. An anti-rotation washer generally uses tabs or keyed geometry to help retain the axle.
Both components can play important roles in wheel retention, but their installation depends on the manufacturer’s design.
Never substitute torque values, washer positions, or torque-arm arrangements from another bike. If the correct procedure is unavailable, ask an eBike-qualified mechanic to complete the work.
Manufacturer-specific guidance, such as Rad Power Bikes’ flat-tire service information, demonstrates why the arrangement of rear-wheel hardware must be documented carefully.
6. Remove the Rear Wheel Only When Necessary
If the puncture cannot be repaired with the wheel installed, follow the removal sequence specified for your exact eBike model.
- Secure the bike. Use an appropriately rated work stand or another manufacturer-approved support arrangement. Keep pressure away from the display, wiring, brake levers, and vulnerable accessories.
- Prepare the drivetrain and brake. Follow the specified procedure for the chain or belt, gearing, fenders, guards, and brake components.
- Disconnect the approved motor connector if required. Confirm the electrical system is off. Keep exposed connector ends clean and dry.
- Record the axle hardware. Photograph its arrangement and remove components only in the prescribed order. Keep the left- and right-side hardware organized.
- Support the wheel throughout removal. Guide the axle out without rotating it against the cable, bending the rotor, or allowing the heavy hub to drop.
- Place the wheel on a safe surface. Protect the motor cable, connector, and brake rotor from impacts and contamination.
Stop if the axle binds, the wheel cannot clear the frame, or the motor cable begins supporting any of the wheel’s weight.
Forcing the assembly can damage the dropout, wiring, connector, or brake components.
7. Remove the Tire, Find the Cause, and Repair It
With the wheel safely supported, deflate the tire completely. Release one side of the bead using tire levers compatible with the rim.
Remove the tube, noting its orientation relative to the valve hole. Once you find the puncture, compare its location with the corresponding area of the tire and rim.
A hole on the tread-facing side often indicates an external puncture. Two closely spaced slits may indicate a pinch flat. Damage on the rim-facing side may suggest worn rim tape or an exposed spoke hole.
Inspect the tire’s entire inner circumference carefully. A small thorn or glass fragment can remain embedded after the original tube is removed.
Check the tire bead, casing, sidewalls, and rim tape. Replace severely damaged tires and arrange appropriate repairs for cracked or deformed rim components.
When fitting a replacement tube, inflate it just enough to hold its shape. Place it inside the tire without twisting, and ensure that the valve passes straight through the rim.
Work the tire bead back into place without catching the tube. Inflate partially, inspect both bead lines around the wheel, and confirm that the tube is not trapped before inflating to the permitted operating pressure.
If the wheel uses a tubeless system, follow the approved procedure for that specific tire and rim combination. Park Tool also provides a tubeless tire mounting and repair guide.
8. Reinstall the Wheel Without Pinching the Wiring
Reinstallation is where a successful puncture repair can become an electrical or mechanical problem. Follow the exact manufacturer’s procedure throughout this stage.
- Position the wheel correctly. Guide it into the dropouts while maintaining the original cable exit direction and keeping the wiring away from pinch points.
- Reconnect the drivetrain and brake components. Follow the manufacturer’s instructions for chain or belt engagement and brake alignment.
- Restore the original axle hardware. Reinstall washers, spacers, nuts, and torque arms in their documented positions. Verify that the axle seats fully in the dropouts.
- Tighten to the specified torque. Use the correct tightening sequence and the manufacturer’s precise values. Do not substitute a generic figure from another eBike.
- Reconnect the motor cable as instructed. Match approved connector alignment marks or keyed features without twisting or forcing the connection.
- Restore protective cable routing. Reattach cable clips and confirm clearance from the tire, rotor, chain, frame edges, and moving suspension components.
If a washer cannot seat, hardware differs from the original arrangement, or you cannot confirm the correct torque, do not ride.
Hub-motor wheel retention is safety-critical, and an incorrectly installed rear wheel can fail even when the tire itself has been repaired successfully.
9. Check the eBike Before Riding
Complete all six checks before the first test ride.
Confirm correct tire dimensions and inflation pressure, a straight valve, an evenly seated bead, and no bulges, cuts, or trapped tube.
Check that the wheel is fully seated and all axle hardware, anti-rotation washers, and torque arms are correctly installed and secured to the manufacturer’s specifications.
Look for cuts, pinches, or stretched wiring. Confirm that the approved connector is fully seated and the cable remains clear of moving parts and pinch points.
Confirm normal brake-lever feel and proper braking. Check that the rotor and pads operate correctly without new dragging or rubbing.
Make sure the chain or belt is correctly engaged and all guards, fenders, and accessories are restored and secure.
Only after the mechanical checks pass, restore power as instructed and watch for error codes or abnormal motor behavior.
Incorrect axle retention, damaged wiring, abnormal braking, or motor faults must be resolved before riding. Ask an eBike-qualified technician if you cannot verify the repair safely.
With the bike securely supported and electrical assistance off, spin the wheel by hand. Confirm that it turns normally, the tire clears the frame, and the brake does not rub abnormally.
Once all mechanical and electrical checks have passed, perform a cautious low-speed test in a clear area.
Stop immediately if you notice wobbling, rubbing, unusual noise, intermittent motor power, braking changes, or error messages. If there is any doubt about axle retention after wheel removal, arrange a professional inspection before riding.
10. Common Mistakes That Cause a Second Repair
Most problems after a hub-motor flat repair come from disturbing something beyond the tire itself. The following mistakes are particularly important to avoid.
- Letting the wheel hang by its wiring: The weight of a hub-motor wheel can damage conductors or the cable exit even when the insulation looks intact.
- Turning the axle while the cable is restrained: This can twist or pinch internal wiring.
- Mixing up axle washers or torque-arm parts: Their correct orientation is model-specific.
- Guessing axle torque: Tightening by feel is not a substitute for the manufacturer’s specifications.
- Forcing an electrical connector: Keyed pins and weather seals can be damaged.
- Skipping the puncture search: A thorn or fragment of glass can immediately destroy a replacement tube.
- Inflating before checking the tire bead: A trapped tube or poorly seated bead can cause another failure.
- Riding before testing the brakes: A wheel that spins freely is not necessarily safely reassembled.
A careful repair takes a little longer, but documenting the components and completing the final safety checks can prevent a much more expensive problem.
11. When to Choose an eBike-Qualified Bike Shop
Professional service is the better option if your bicycle has an inaccessible or damaged motor connector, uncertain axle hardware, an unusual torque-arm arrangement, a bent dropout, a damaged rim, a brake problem, or a persistent motor error.
The same applies if you cannot find the manufacturer’s service instructions or cannot safely support the weight of the bicycle.
Ask whether the shop regularly services rear hub-motor eBikes and whether its technicians can follow the exact axle-retention and motor-cable procedures for your model.
A rear flat tire is often a routine repair. Correctly protecting the hub-motor wiring and reinstalling the axle hardware should never involve guesswork.
Frequently Asked Questions
Do I have to disconnect the motor cable to change a rear tube?
Not always. Some accessible punctures can be patched with the wheel installed. A full tube replacement often requires wheel removal, and whether the motor connector must be disconnected depends on the bike’s approved service procedure. Never pull on the cable or unplug a powered connector.
Can I use a normal bicycle inner tube on a hub-motor eBike?
Often yes, if the tube matches the tire diameter, compatible width range, valve type, and manufacturer’s requirements. Check the tire and bike’s load requirements; do not choose by the word “eBike” alone.
Why are torque arms and anti-rotation washers important?
They may help resist axle rotation and secure the hub-motor assembly. Their position and installation are specific to the model. Incorrect placement can make an otherwise successful tire repair unsafe.
What if the motor works but its cable looks pinched?
Stop using the bike. Visible pinching, cracked insulation, damaged connector housings, or uncertain routing warrant inspection by an eBike-qualified technician even if the motor still powers on.
Can I repair a flat on a tubeless eBike tire the same way?
No. Tubeless repairs use methods compatible with the tire and rim system, such as an approved tread puncture plug or sealant procedure. Follow the tire manufacturer’s rules, and replace a tire with unsafe sidewall or casing damage.
The Bottom Line
Fixing a hub motor eBike rear flat is often manageable, but the safest approach begins with one decision: avoid removing the wheel when a proper in-place repair is possible.
If wheel removal becomes necessary, protect the motor cable, document the axle hardware, follow your exact model’s instructions, and verify the brakes and wheel retention before riding.
A repaired tire is only a successful repair when the entire bicycle is safe to use.